
The Complete Guide to Cold Sterilization Containers
Why Cold Sterilization Containers Are Essential for Modern Healthcare Facilities
Cold sterilization containers are specialized vessels designed to safely immerse medical and dental instruments in chemical disinfectants without using heat. These containers provide a critical alternative to autoclaving for heat-sensitive instruments that would be damaged by steam sterilization.
Quick Answer for Cold Sterilization Containers:
- What they are: Sealed trays that hold instruments in chemical sterilants
- Key materials: Heavy-gauge plastic, stainless steel, or anodized aluminum
- Capacity range: 1 quart to 22 quarts (up to 1 gallon liquid capacity)
- Main features: Perforated drain baskets, fitted lids, solution-change calendars
- Primary use: Sterilizing delicate instruments that can't withstand autoclave heat
- Industries: Dental offices, veterinary clinics, pathology labs, funeral homes
The demand for these containers has surged dramatically. Over 700 cold sterilization trays were purchased in the past month on Amazon alone, reflecting growing adoption across clinical and veterinary settings. This growth stems from healthcare facilities' need to protect expensive, heat-sensitive instruments while maintaining strict infection control standards.
Modern cold sterilization containers feature smart design elements like ribbed drain baskets for quick solution removal, integrated calendars on lids to track solution changes, and chemical-resistant materials that withstand repeated exposure to harsh disinfectants. Popular models range from compact 1-quart dental trays to large 22-quart pathology containers that can process entire instrument sets in a single cycle.
I'm Mortuary Cooler, a national-level mortuary cooler supplier with extensive experience helping funeral homes and pathology labs select the right equipment for their sterilization workflows. Through my work with mortuary facilities nationwide, I've seen how proper cold sterilization containers can streamline prep room operations while ensuring compliance with health regulations.
Cold Sterilization Containers 101
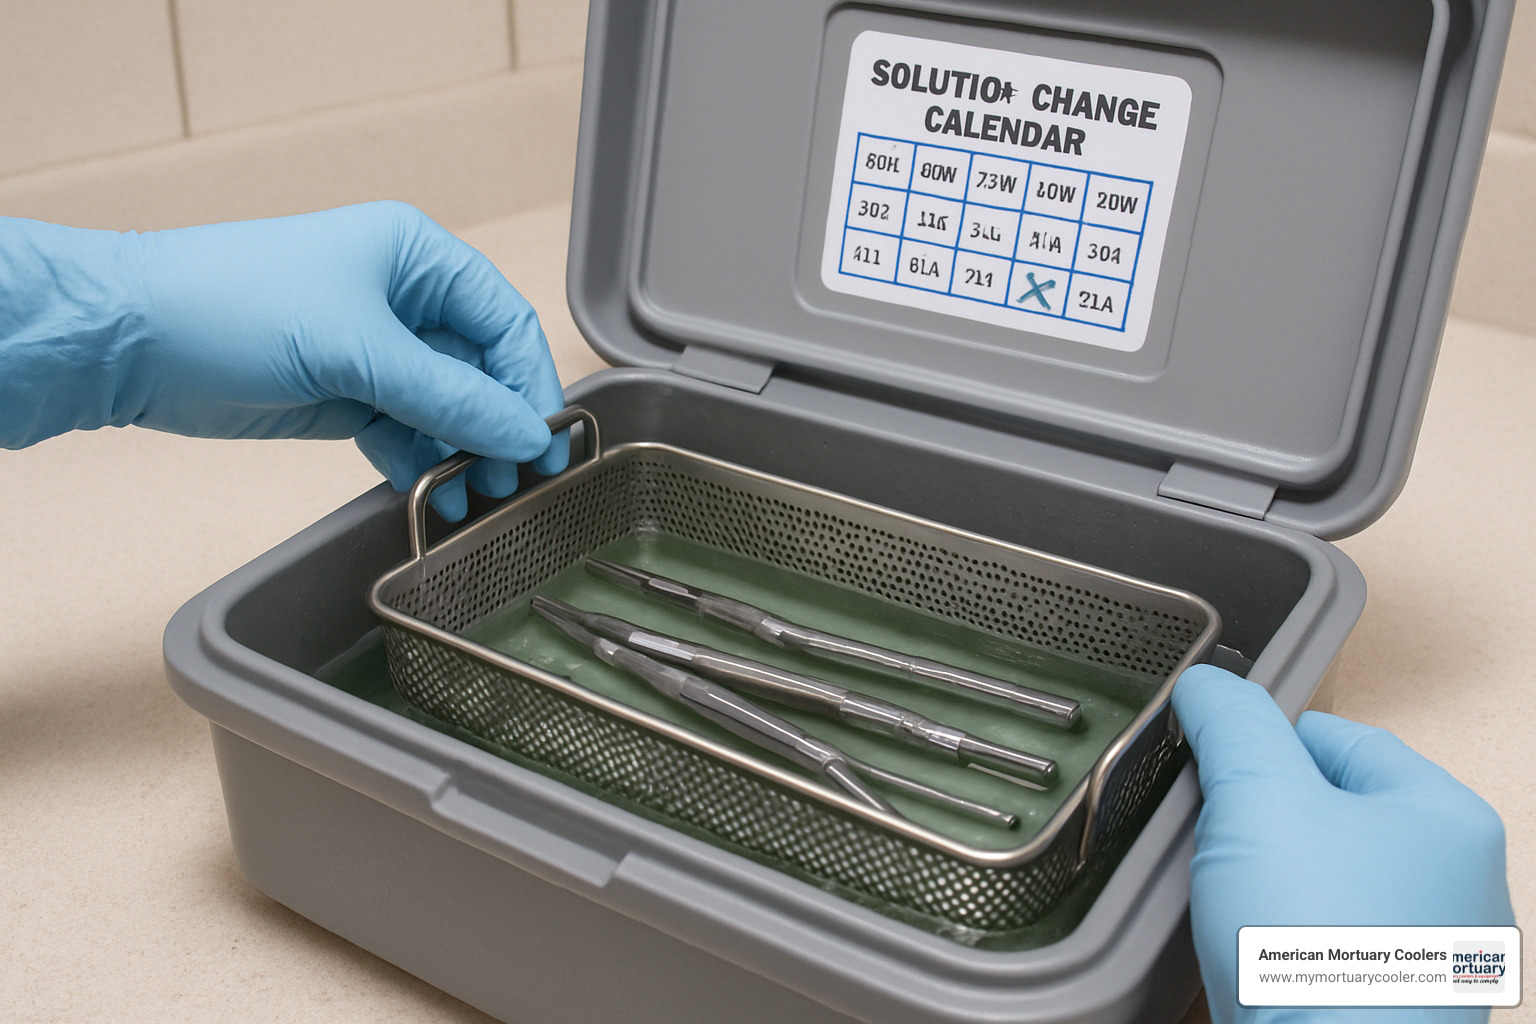
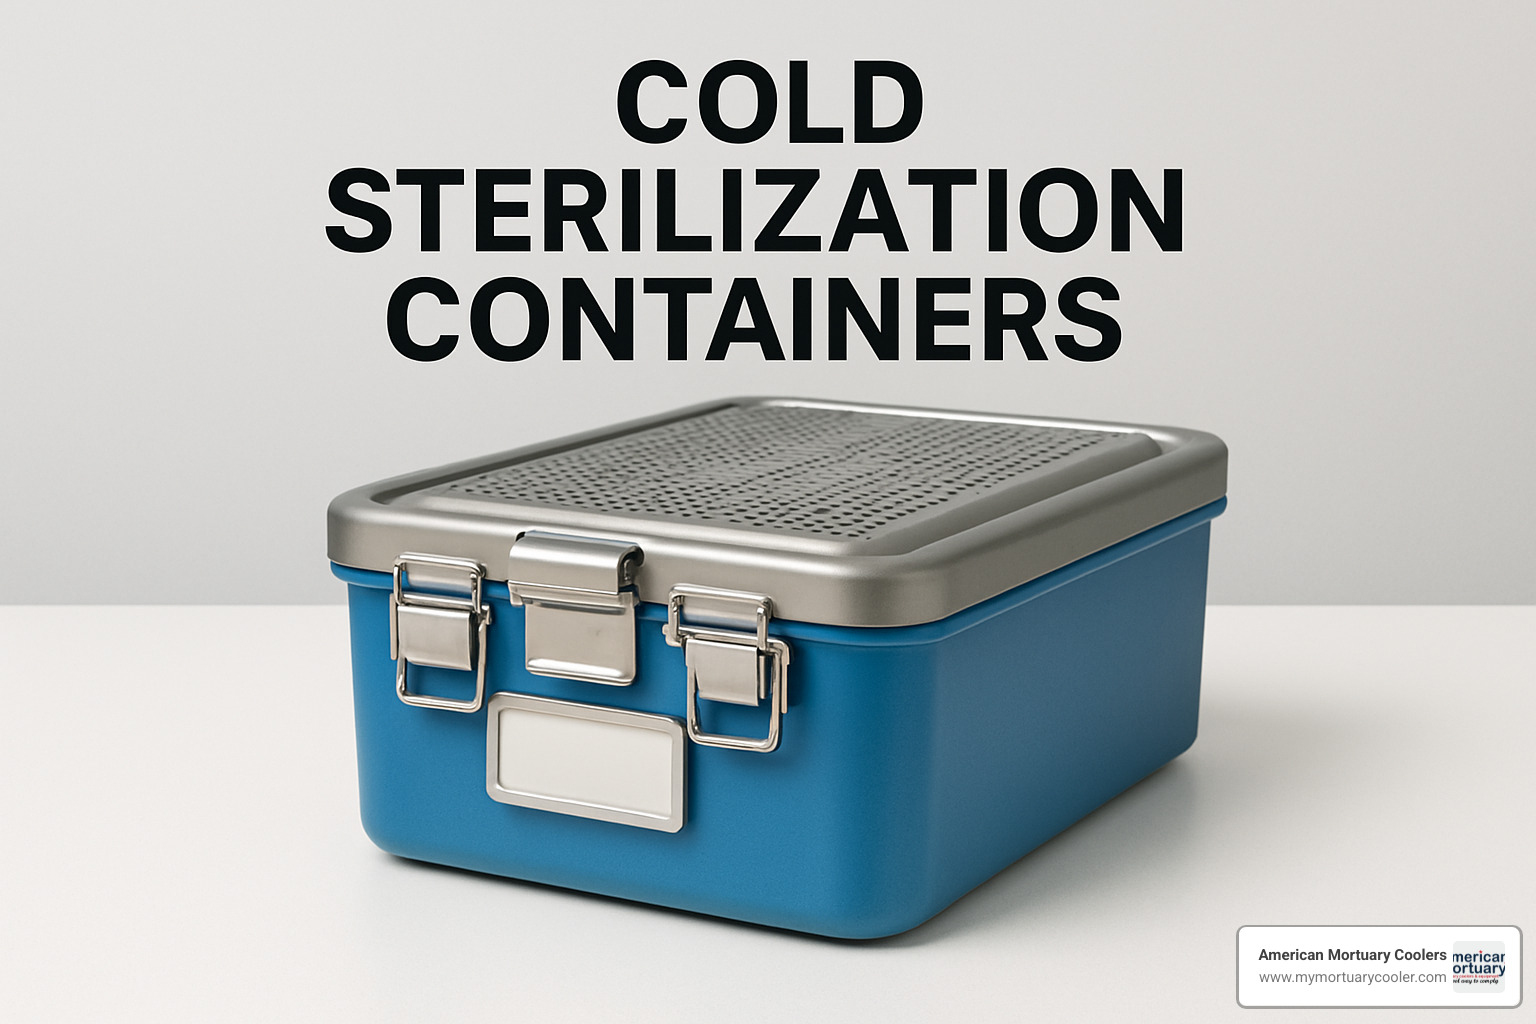
Think of cold sterilization containers as the careful, methodical cousin of the autoclave. These sealed soaking vessels are specifically designed for chemical immersion sterilization - a gentler approach that protects your most delicate instruments while still achieving high-level disinfection.
Unlike the high-heat steam method, cold sterilization relies on chemical immersion rather than temperature to eliminate pathogens. The process involves completely submerging instruments in EPA-registered disinfectants for controlled contact periods. This makes it perfect for heat-sensitive items like fiber optic equipment, certain plastics, and electronic components that would be ruined in an autoclave.
What makes these containers special is their thoughtful design for instrument protection. The Steri-Soaker Germicide Tray, for example, holds up to 1 gallon of solution and accommodates larger items like cassettes and bur blocks. The perforated drain basket keeps instruments liftd and allows for quick solution removal without staff having to fish around in chemicals.
One of my favorite features is the solution-change calendar integrated right into many container lids. It's a simple but brilliant innovation that helps busy staff track when solutions need refreshing - no more guessing or hoping someone remembered to write it down somewhere.
At American Mortuary Coolers, we've helped pathology labs from coast to coast implement effective cold sterilization workflows. The key insight we've learned is that these aren't just fancy trays - they're precision tools for infection control that require the same attention to detail as any other critical equipment.
For facilities looking to develop comprehensive sterilization protocols, Bioactive Services: Safe Sterilization offers excellent guidance on implementing safe sterilization practices across different healthcare settings.
How Cold Sterilization Containers Differ from Autoclave Rigid Containers
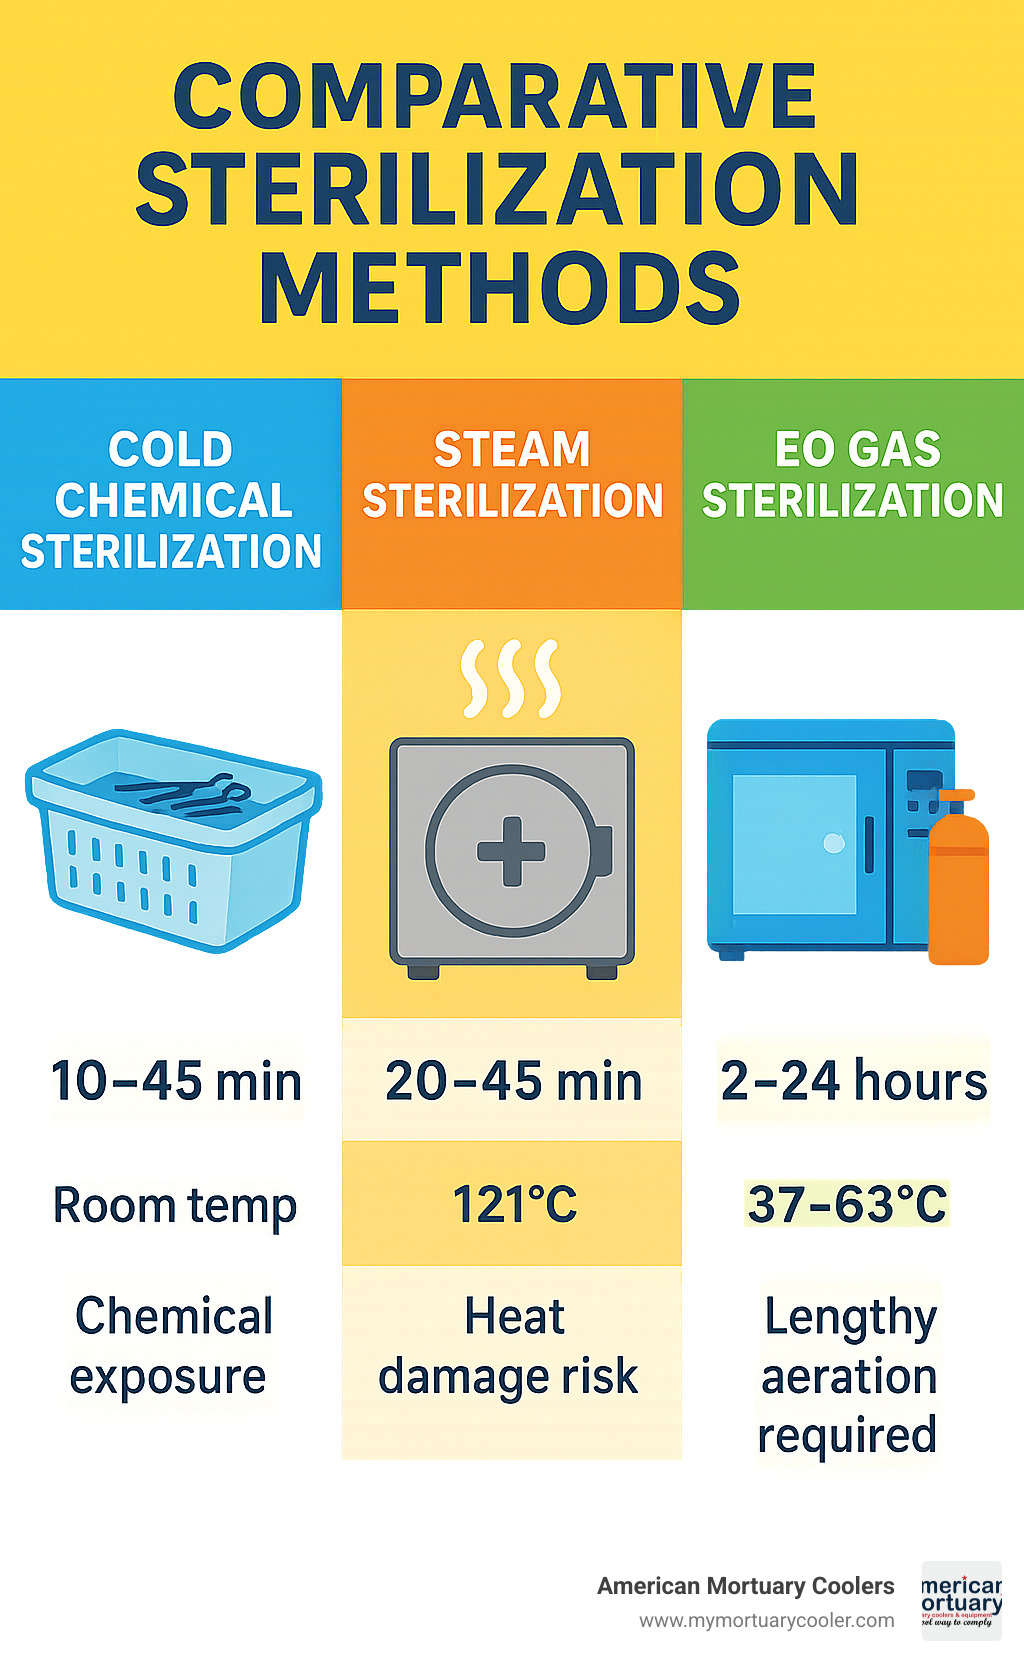
The biggest difference is obvious but worth stating: temperature exposure. Autoclave containers are built to withstand 121°C steam cycles, while cold sterilization containers work at room temperature using chemical agents. This fundamental difference opens up sterilization possibilities for instruments that simply can't handle the heat.
Workflow speed varies significantly between the two methods. Autoclave cycles typically take 20-45 minutes plus cooling time, while cold sterilization contact times range from 10-45 minutes depending on your chosen chemical. However, cold sterilization requires additional steps - pre-cleaning and triple rinsing - that autoclaving doesn't need.
The wrap-free nature of cold sterilization offers real advantages in busy clinical settings. Instruments go directly from container to use without the unwrapping step, reducing both contamination risk and setup time. It's streamlined and efficient.
But here's the trade-off: increased chemical exposure risk. While autoclaves seal everything away during their cycles, cold sterilization requires proper ventilation and personal protective equipment. Staff need training on safe handling procedures and spill response.
Key Terms & Standards to Know
Let's decode the terminology that matters most. High-level disinfectants (HLDs) are EPA-registered chemicals capable of killing all microorganisms except large numbers of bacterial spores. These are the heavy-duty solutions that make cold sterilization effective.
The Spaulding classification system is your roadmap for determining sterilization requirements. It categorizes instruments as critical (enters sterile tissue), semi-critical (contacts mucous membranes), or non-critical (contacts intact skin). This classification determines whether you need sterilization or can use lower-level disinfection.
FDA 510(k) clearance on sterilization containers means they've met federal safety and effectiveness standards. It's your assurance that the container will perform as expected under clinical conditions.
CDC guidelines provide the framework for proper use, including specific contact times, concentration requirements, and safety protocols. These aren't suggestions - they're the standards that keep your facility compliant and your patients safe, whether you're operating in Tennessee like us or anywhere across the contiguous 48 states.
Materials, Design & Capacity Options
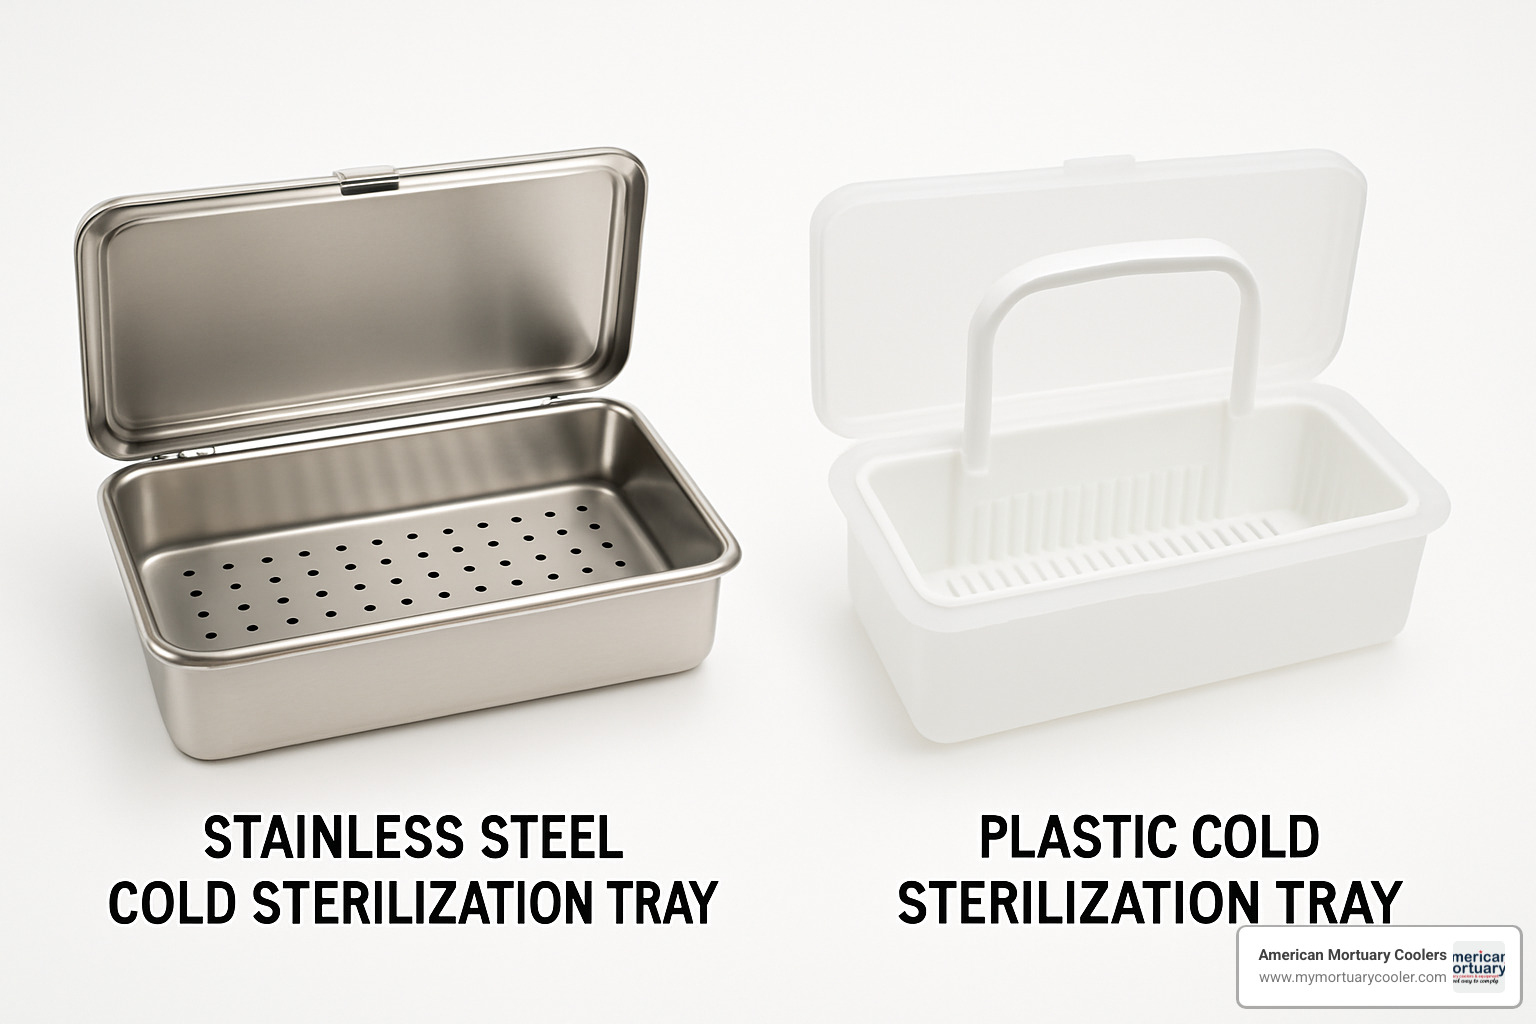
Choosing the right material for your cold sterilization containers can make or break your sterilization workflow. I've seen facilities struggle with containers that crack after just months of use, while others run the same units for years without issues. The secret lies in understanding how different materials handle chemical exposure.
Heavy-gauge polypropylene offers the sweet spot for most facilities. These containers resist temperatures from -20°C to 80°C and won't crack even after hundreds of chemical cycles. The lightweight design makes them easy for staff to handle, and the translucent walls let you see solution levels at a glance. The Jorvet cold sterilization trays exemplify this approach - they're built from durable plastic that stands up to repeated disinfectant exposure while featuring a handled drain basket for safe solution management.
For facilities that demand the ultimate in durability, stainless steel 304 containers deliver professional-grade performance. The Mopec 3-piece set showcases this premium approach, available in sizes up to 22 quarts for processing large instrument sets in single cycles. These units feature an instrument tray, perforated insert tray, and lid that work together for superior decontamination and drainage. Yes, they cost more upfront, but they'll outlast plastic containers by years.
Anodized aluminum splits the difference beautifully. These containers weigh less than steel but outlast plastic, with excellent chemical resistance that keeps them looking professional. The platinum-cured silicone gaskets on quality units ensure proper sealing without degrading from harsh chemicals - a detail that separates good containers from great ones.
The perforated drain basket design appears across all quality materials. These baskets lift instruments above the container bottom, ensuring complete solution contact while making drainage quick and safe. Hinged or fitted lid options depend on your workflow preferences - hinged lids stay attached but require more counter space, while fitted lids store compactly but can be misplaced.
Capacity options range from compact 1-qt dental trays perfect for small practices to massive 22-qt pathology containers that handle entire dissection sets. This range ensures you're not paying for unused capacity or cramming too many instruments into undersized containers.
For comprehensive guidance on selecting equipment that complements your sterilization setup, explore our More info about Prep Room Supplies.
| Material | Durability Rating | Chemical Resistance | Cost Range | Best For |
|---|---|---|---|---|
| Heavy-gauge polypropylene | Good (3-5 years) | Excellent | $ | High-volume daily use |
| Stainless steel 304 | Excellent (10+ years) | Superior | $$$ | Premium facilities |
| Anodized aluminum | Very good (5-8 years) | Excellent | $$ | Balanced performance |
Key Features That Make Cold Sterilization Containers Chemical-Ready
The best cold sterilization containers aren't just boxes with lids - they're engineered systems designed for safe chemical handling. Ribbed and perforated inserts represent the foundation of effective design. These features prevent instruments from lying flat against the container bottom, ensuring disinfectant reaches every surface while enabling quick drainage when the cycle completes.
Auto-elevating baskets take convenience to the next level. When you open the lid, the basket automatically rises, letting excess solution drain back into the container before you touch any instruments. This feature dramatically reduces staff exposure to chemicals and prevents hazardous dripping during instrument transfer.
Fill-line markings in both quarts and liters eliminate guesswork. Overfilling wastes expensive disinfectants, while underfilling leaves instrument surfaces exposed. These simple markings ensure consistent, effective sterilization while controlling chemical costs.
Non-skid feet might seem minor, but they prevent dangerous container movement during loading and unloading. In busy prep rooms where staff move quickly, stable containers prevent spills and injuries.
The integrated solution-change calendars on quality lids deserve special mention. These systems remind staff when solutions lose effectiveness, ensuring regulatory compliance and sterilization efficacy. Some models feature dial systems for specific dates, while others use removable date rings - both approaches beat trying to remember change schedules during hectic workdays.
Size & Capacity Selection Guide
Getting the size right matters more than most people realize. Too small, and you're running multiple cycles daily. Too large, and you're wasting expensive chemicals on partial loads.
Half-size DIN containers work perfectly for small dental practices processing individual instrument sets. These 1-4 quart units handle basic cassettes efficiently while fitting standard countertop spaces.
Full-size containers serve larger practices and labs effectively. The 1-gallon dental tray design, like the Steri-Soaker, provides ample space for multiple cassettes and bur blocks while maintaining efficient solution usage. At 14" x 8" x 5", these units maximize capacity without overwhelming workspace.
10-quart lab basins handle routine pathology instrument processing, while 22-quart pathology tubs accommodate large dissection sets and specialized tools. The Mopec BA054 measures 20.75" L x 12.75" W x 6" D and weighs 15 pounds, providing substantial capacity for high-volume operations without becoming unwieldy.
At American Mortuary Coolers, we've helped facilities across all 48 contiguous states select the right capacity for their workflows. The key is matching container size to your typical instrument load while allowing room for occasional larger batches.
Step-By-Step Cold Sterilization Workflow & Chemical Compatibility
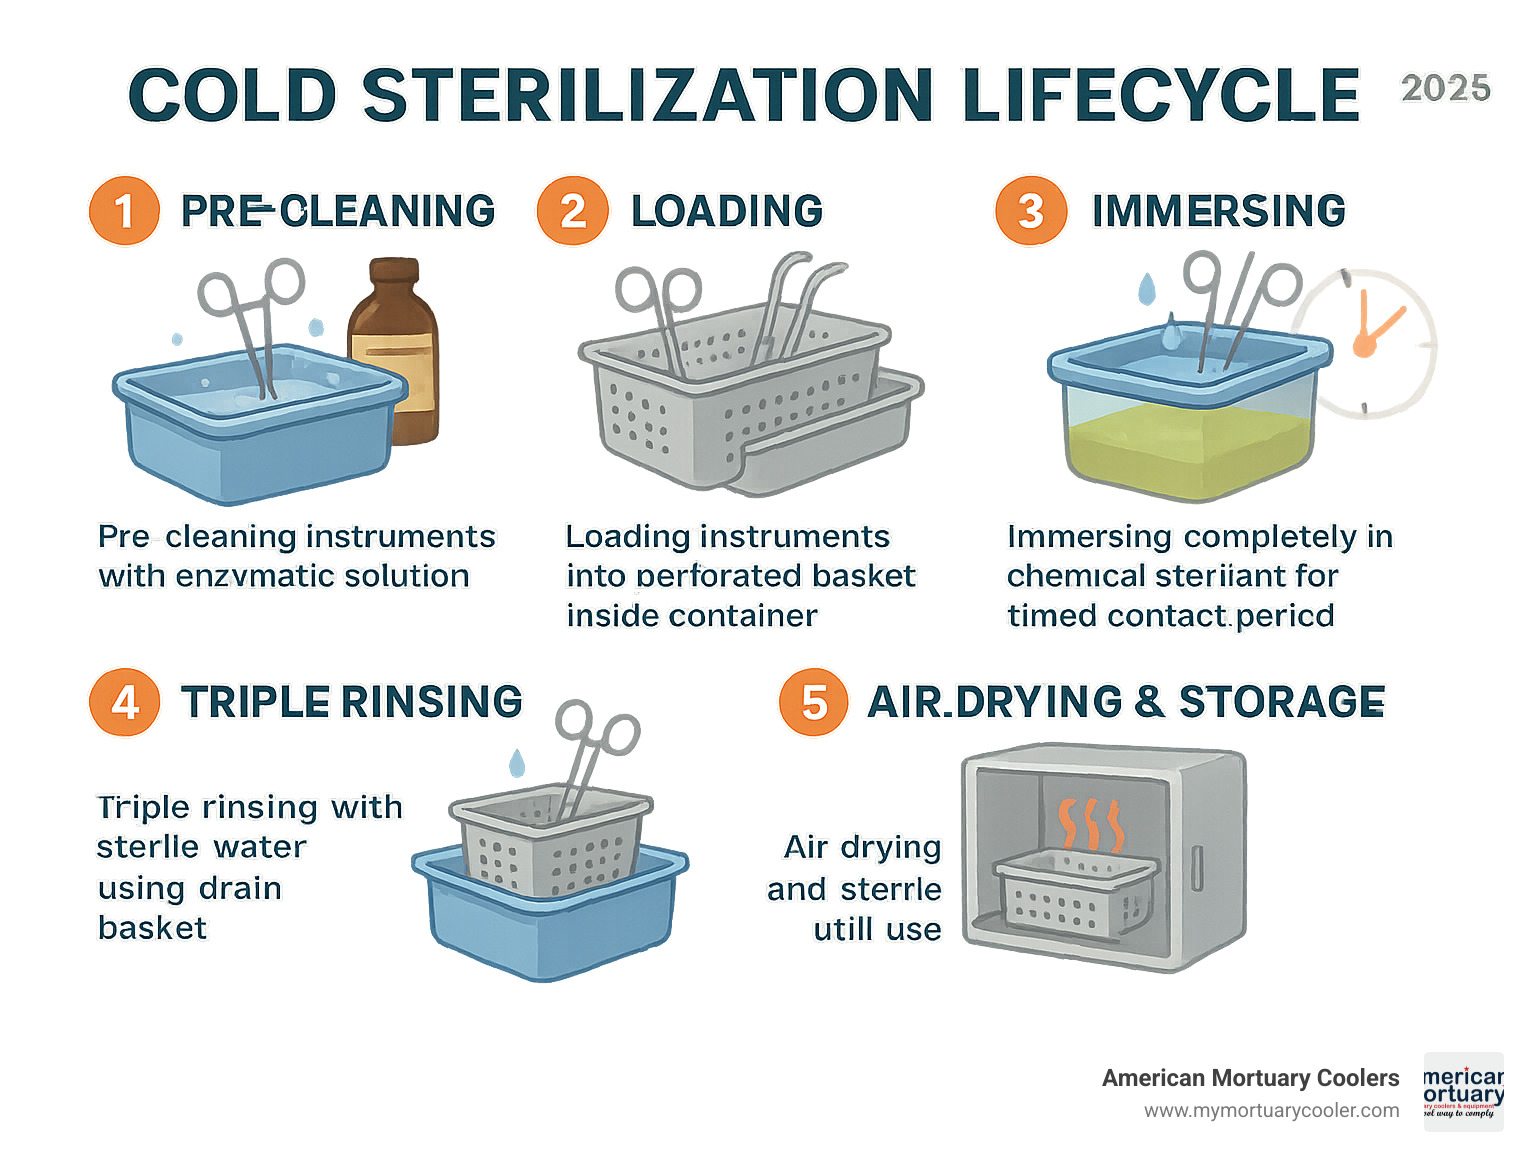
Getting your cold sterilization process right isn't just about following steps—it's about creating a safe, efficient workflow that protects both your instruments and your staff. After working with funeral homes and pathology labs across all 48 states, I've seen what works and what doesn't when it comes to cold sterilization containers.
The process starts with pre-cleaning using enzymatic soak. This isn't optional—it's absolutely critical. Think of it like washing dishes before putting them in the dishwasher. Blood, tissue, and other organic matter will block disinfectants from doing their job properly. Skip this step, and you're setting yourself up for failure.
Next, load instruments carefully into the perforated basket. Don't just toss them in there. Make sure instruments aren't overlapping or touching the container sides. Every surface needs to be exposed to the chemical solution. When you immerse completely, double-check that solution covers everything. If you can see any part of an instrument above the solution line, add more liquid.
Contact time is where many facilities mess up. Glutaraldehyde typically requires 10-45 minutes, depending on the concentration and what you're trying to kill. Ortho-phthalaldehyde works faster—sometimes just 12 minutes for high-level disinfection. But here's the thing: longer isn't always better. Extended contact can damage instruments or cause staining.
The triple rinse with sterile water step is non-negotiable. Chemical residues left on instruments can cause tissue irritation or corrode your expensive tools over time. After rinsing, air dry completely and store in sterile conditions until you're ready to use them.
When it comes to chemical compatibility, glutaraldehyde 2% remains the workhorse of the industry. It kills bacteria, viruses, fungi, and mycobacteria—basically everything you need to worry about. The downside? It smells terrible and requires excellent ventilation.
Ortho-phthalaldehyde (OPA) is the newer kid on the block. It works faster and doesn't have that awful smell, but it will turn your instruments brown. Don't panic—it's just cosmetic staining that doesn't affect function.
Hydrogen peroxide-based solutions are becoming popular because they're more environmentally friendly and work quickly. Phenolic compounds work well for non-critical instruments, while alcohol blends provide rapid action but can damage certain plastics over repeated use.
For facilities looking to upgrade their entire sterilization setup, Sterile Processing Equipment & Sterilization Solutions offers comprehensive resources and equipment options.
Best Practices for Safe Chemical Handling
Safety isn't just about following rules—it's about getting everyone home healthy at the end of the day. MSDS review should be your first step with any new chemical. I know, I know—nobody likes reading safety sheets. But spending ten minutes reading could save you from a trip to the emergency room.
Keep spill kits in every area where you handle chemicals. Include absorbent materials, neutralizing agents, and personal protective equipment. Train your staff on spill response and actually practice it. A drill when nothing's wrong is way better than panic when something goes sideways.
Solution-change logs serve double duty—they keep you safe and keep inspectors happy. Document when you mix solutions, when they expire, and when you toss them out. Those integrated calendar lids on modern containers help, but written records are your backup when regulators come calling.
Staff training needs to cover the basics: proper PPE use, ventilation requirements, and the golden rule of chemical safety—never mix different chemicals. Always add chemicals to water, not the other way around. Chemistry class was a long time ago, but this rule still matters.
Troubleshooting Common Issues
Cloudy instruments after processing usually mean your water quality isn't up to par or you're not rinsing enough. Switch to distilled or deionized water for final rinses. Those white spots and film? That's mineral buildup, and it's completely preventable.
Residual chemical odor tells you two things: you need more rinse cycles and better ventilation. Glutaraldehyde has a particularly nasty smell that lingers. If staff are complaining about odors, listen to them and fix your ventilation system.
Instrument staining is mostly cosmetic but understandably frustrating. OPA causes brown staining that won't hurt function but looks unprofessional. The fix? Reduce contact time to the minimum effective duration. Your instruments will thank you.
Shortened solution life usually points to contamination from poor pre-cleaning or overuse. If your solution is turning cloudy or changing color before it should, go back to basics. Better pre-cleaning and more frequent solution changes will save money in the long run.
Working with pathology labs from Tennessee to California, I've seen these same issues pop up repeatedly. The good news? They're all fixable with attention to detail and proper procedures.
Applications, Maintenance & Buying Guide
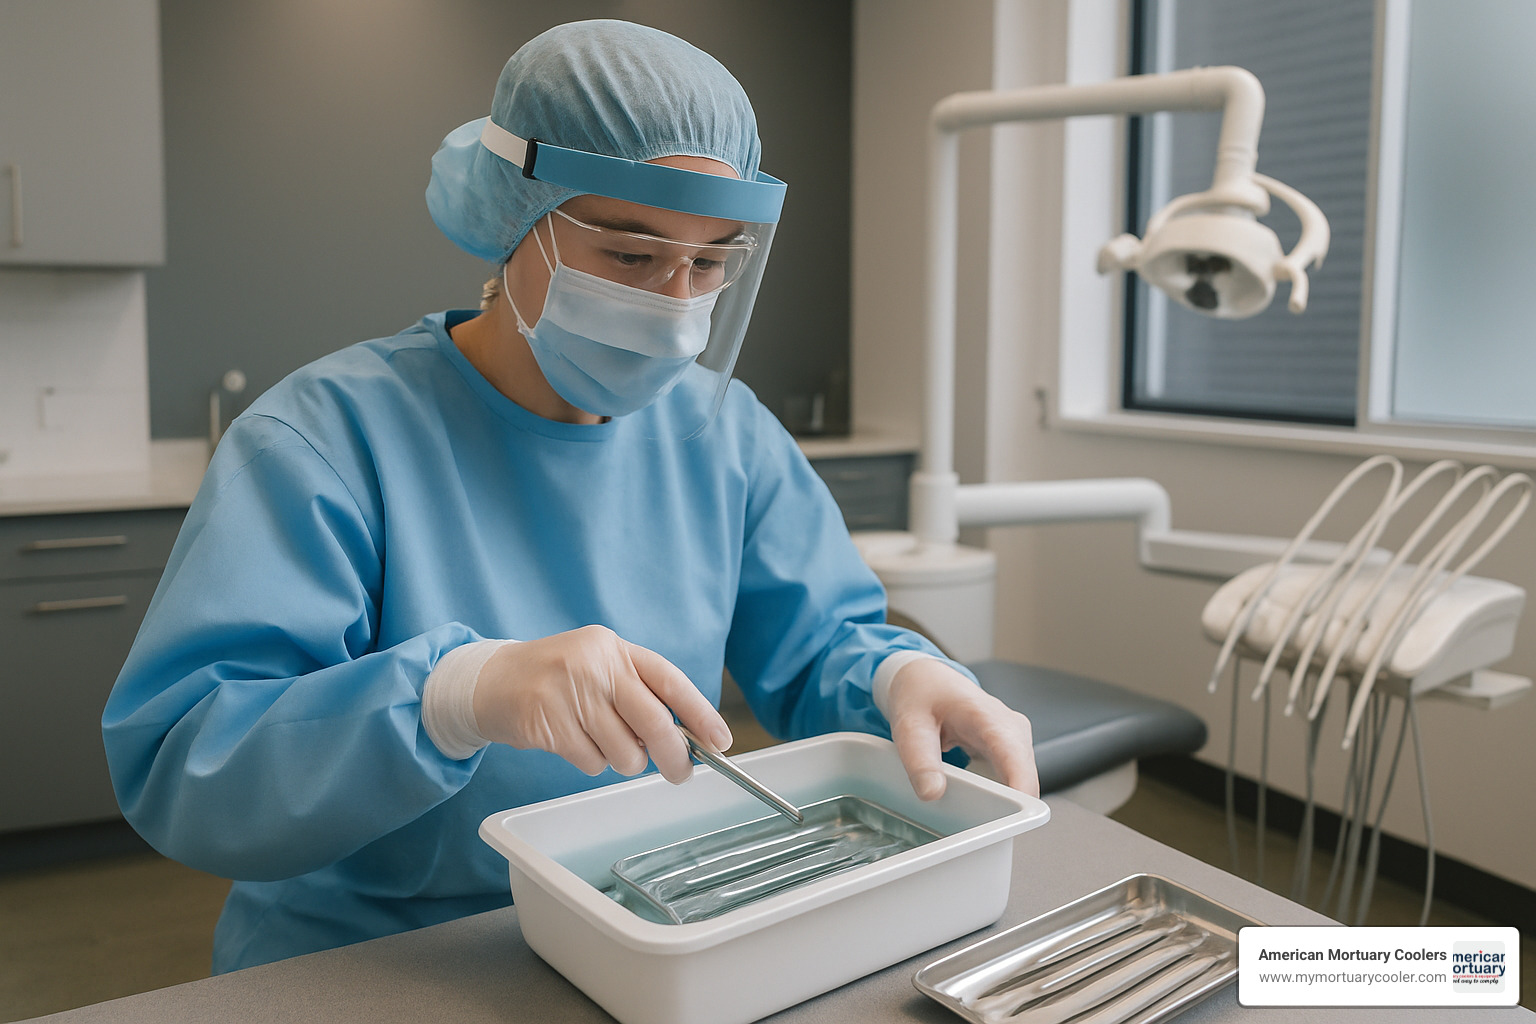
Cold sterilization containers serve diverse applications across healthcare settings. Veterinary practices rely on them for delicate surgical instruments that can't withstand autoclave temperatures. Dental offices use them for handpieces, burs, and impression materials that would be damaged by steam sterilization.
Pathology and histology labs process dissection instruments, microtomes, and specialized tools that require gentle yet effective sterilization. At American Mortuary Coolers, we've equipped facilities from our Johnson City, Tennessee headquarters to our service areas in Dallas, Chicago, and Los Angeles with appropriate cold sterilization solutions.
Tattoo and piercing studios use these containers for jewelry and instruments that need sterilization without heat damage. Field medicine applications include military and emergency response settings where autoclaves aren't available but chemical sterilization remains feasible.
OSHA and EPA regulations govern chemical sterilization practices. OSHA's Hazard Communication Standard requires proper labeling, safety data sheets, and worker training. EPA registration ensures that disinfectants meet efficacy standards for their intended use.
Maintenance requirements are straightforward but critical. Daily rinsing with clean water removes chemical residues and prevents buildup. Weekly deep cleaning with neutral pH detergent maintains container integrity. Monthly gasket checks ensure proper sealing and prevent chemical leaks.
Container lifespan varies by material and usage intensity. High-quality plastic containers typically last 3-5 years with proper care, while stainless steel units can serve 10+ years. Regular inspection for cracks, warping, or gasket deterioration helps predict replacement needs.
For specialized histology applications, our More info about The Complete Guide to Histology Supplies provides additional insights into equipment selection and workflow optimization.
Selecting Cold Sterilization Containers for Your Facility
Cold sterilization containers selection requires careful consideration of multiple factors. Start by assessing your instrument volume and processing frequency. High-volume practices need larger containers or multiple units to maintain workflow efficiency.
Chemical choice influences container material selection. Glutaraldehyde works with most materials, while some newer chemicals may require specific plastics or coatings. Consult chemical manufacturers' compatibility charts before making decisions.
Tray material affects both cost and durability. Plastic units offer lower initial investment but may require more frequent replacement. Stainless steel costs more upfront but provides longer service life and professional appearance.
Lid style impacts workflow efficiency. Hinged lids stay attached during use, while removable lids allow easier cleaning but may be misplaced. Auto-lift basket features reduce chemical exposure but increase complexity and cost.
Storage footprint matters in space-constrained facilities. Stackable designs maximize storage efficiency, while non-stackable units may require dedicated shelf space. Consider both active use and storage requirements.
Unit price varies significantly based on features and materials. Budget containers start around $50, while premium stainless steel units can exceed $500. Balance initial cost against expected lifespan and features needed for your application.
Cleaning and Maintenance Checklist
Daily maintenance starts with thorough rinsing using clean water to remove chemical residues. Empty containers completely and rinse all surfaces, paying special attention to corners and crevices where chemicals might accumulate.
Use neutral pH detergent for weekly deep cleaning. Avoid abrasive cleaners that might scratch surfaces or damage gaskets. Soft-bristle brushes help remove stubborn residues without causing damage.
Air-dry containers inverted to prevent water pooling. Moisture retention can lead to bacterial growth or chemical dilution in subsequent uses. Ensure complete drying before storage or next use.
Inspect hinges regularly for smooth operation and signs of wear. Lubricate if necessary with food-grade lubricants that won't contaminate sterilization solutions. Replace hinges if they become loose or corroded.
Replace warped or cracked baskets immediately. Damaged baskets may not drain properly or could harbor contaminants. Keep spare baskets on hand to minimize downtime.
Record cycle counts to track usage and predict maintenance needs. High-use containers may require more frequent inspection and earlier replacement than occasional-use units.
Regulatory and Safety Considerations
FDA 21 CFR Part 880 governs medical device sterilization equipment, including cold sterilization containers. Containers used in medical settings must meet these standards for materials, design, and labeling.
EPA-registered sterilants must be used according to label directions. Using chemicals outside their approved parameters violates federal regulations and may compromise sterilization efficacy.
OSHA Hazard Communication Standard requires proper chemical labeling, safety data sheet availability, and worker training. Document training completion and maintain records for inspection.
State dental and veterinary boards often have specific requirements for sterilization procedures and equipment. Check local regulations to ensure compliance with professional practice standards.
Disposal of spent solutions must follow EPA and local regulations. Many sterilization chemicals are considered hazardous waste requiring special handling and disposal procedures.
Frequently Asked Questions
What chemicals are approved for cold sterilization containers? EPA-registered high-level disinfectants include glutaraldehyde, ortho-phthalaldehyde, hydrogen peroxide compounds, and peracetic acid formulations. Each chemical has specific contact times and concentration requirements. Always follow manufacturer instructions and EPA labeling for proper use.
What's the minimum soak time for effective sterilization? Minimum contact times vary by chemical and target organisms. Glutaraldehyde typically requires 10-45 minutes, while OPA may achieve high-level disinfection in 12 minutes. For sterilization (including spores), longer contact times up to 10 hours may be required. Always consult chemical labels for specific requirements.
Can plastic trays discolor or warp from chemical exposure? High-quality plastic containers are formulated to resist chemical damage, but some discoloration is normal over time. Warping usually indicates excessive heat exposure or chemical incompatibility. Replace containers showing significant warping, cracking, or chemical degradation to maintain sterilization efficacy.
Conclusion
Cold sterilization containers have become the backbone of modern infection control for facilities that handle delicate, heat-sensitive instruments. Whether you're running a busy dental practice with expensive handpieces or managing a pathology lab with precision microtomes, these specialized vessels protect your equipment investments while keeping your sterilization protocols rock-solid.
The beauty of cold sterilization lies in its flexibility. A compact 1-quart tray works perfectly for a small veterinary clinic processing individual instrument sets, while a robust 22-quart stainless steel container can handle an entire pathology department's daily load. The key is matching your container choice to your actual workflow needs, not just buying the biggest or cheapest option available.
Success with cold sterilization containers comes down to three fundamentals: choosing the right size and material for your instrument volume, following proper chemical handling procedures to keep everyone safe, and maintaining your equipment through regular cleaning and inspection. Skip any of these steps, and you'll find yourself dealing with cloudy instruments, shortened solution life, or worse - failed sterilization.
At American Mortuary Coolers, we've seen how the right sterilization setup transforms prep room operations. From our Tennessee headquarters, we've helped facilities across all 48 contiguous states streamline their workflows. Whether it's a funeral home in California dealing with delicate embalming instruments or a pathology lab in New York processing tissue samples, proper cold sterilization makes everything run smoother.
The investment in quality containers pays for itself quickly. Reduced instrument replacement costs, improved workflow efficiency, and improved safety for your staff add up to real savings. Plus, when regulatory inspectors come knocking, you'll have the confidence that comes from knowing your sterilization protocols are bulletproof.
American Mortuary Coolers delivers durable, custom solutions that integrate seamlessly with your cold sterilization workflow. We understand that sterilization is just one piece of your operation's puzzle - that's why we offer complementary equipment to keep your entire prep area running efficiently. Explore our More info about Operating Table Options to see how we can help optimize your complete setup.
As sterilization requirements continue evolving, having reliable, well-maintained cold sterilization containers keeps your facility ready for whatever comes next. It's not just about meeting today's standards - it's about building a foundation that will serve you well for years to come.


