
Step-by-Step Guide to Replacing a Walk-In Cooler Handle
Why Walk-In Cooler Handle Replacement Is Critical for Your Facility
A walk in cooler handle is more than just a door opener - it's the critical component that ensures proper sealing, temperature control, and safe access to your refrigerated storage. Walk-in cooler door handles are among the most frequently replaced hardware components in commercial refrigeration, with replacement intervals typically ranging from 2 to 5 years depending on usage and environment.
Quick Answer - Walk-In Cooler Handle Basics:
- Function: Controls door latching, sealing, and inside safety release
- Types: Locking vs non-locking, stainless steel vs chrome-plated
- Cost Range: $17.79 to $400+ depending on features and quality
- Replacement Time: Less than 15 minutes with basic tools
- Key Safety Feature: Inside twist release mechanism (required by code)
When a walk-in cooler handle fails, it doesn't just mean inconvenience. A faulty handle can compromise your door seal, leading to energy waste, temperature fluctuations, and potential product loss. Even worse, a broken inside release mechanism creates a serious safety hazard that violates OSHA egress requirements.
The good news? Replacing a walk-in cooler handle is straightforward with the right parts and guidance. High-quality handles from manufacturers like Kason and Component Hardware are designed for thousands of open/close cycles and can withstand heavy commercial use when properly installed.
I'm Mortuary Cooler, a national-level mortuary cooler supplier and US cooler supplier with experience in commercial refrigeration hardware. Having worked with countless facilities on walk in cooler handle replacements and upgrades, I've seen how the right hardware selection and proper installation can extend equipment life and improve operational efficiency.
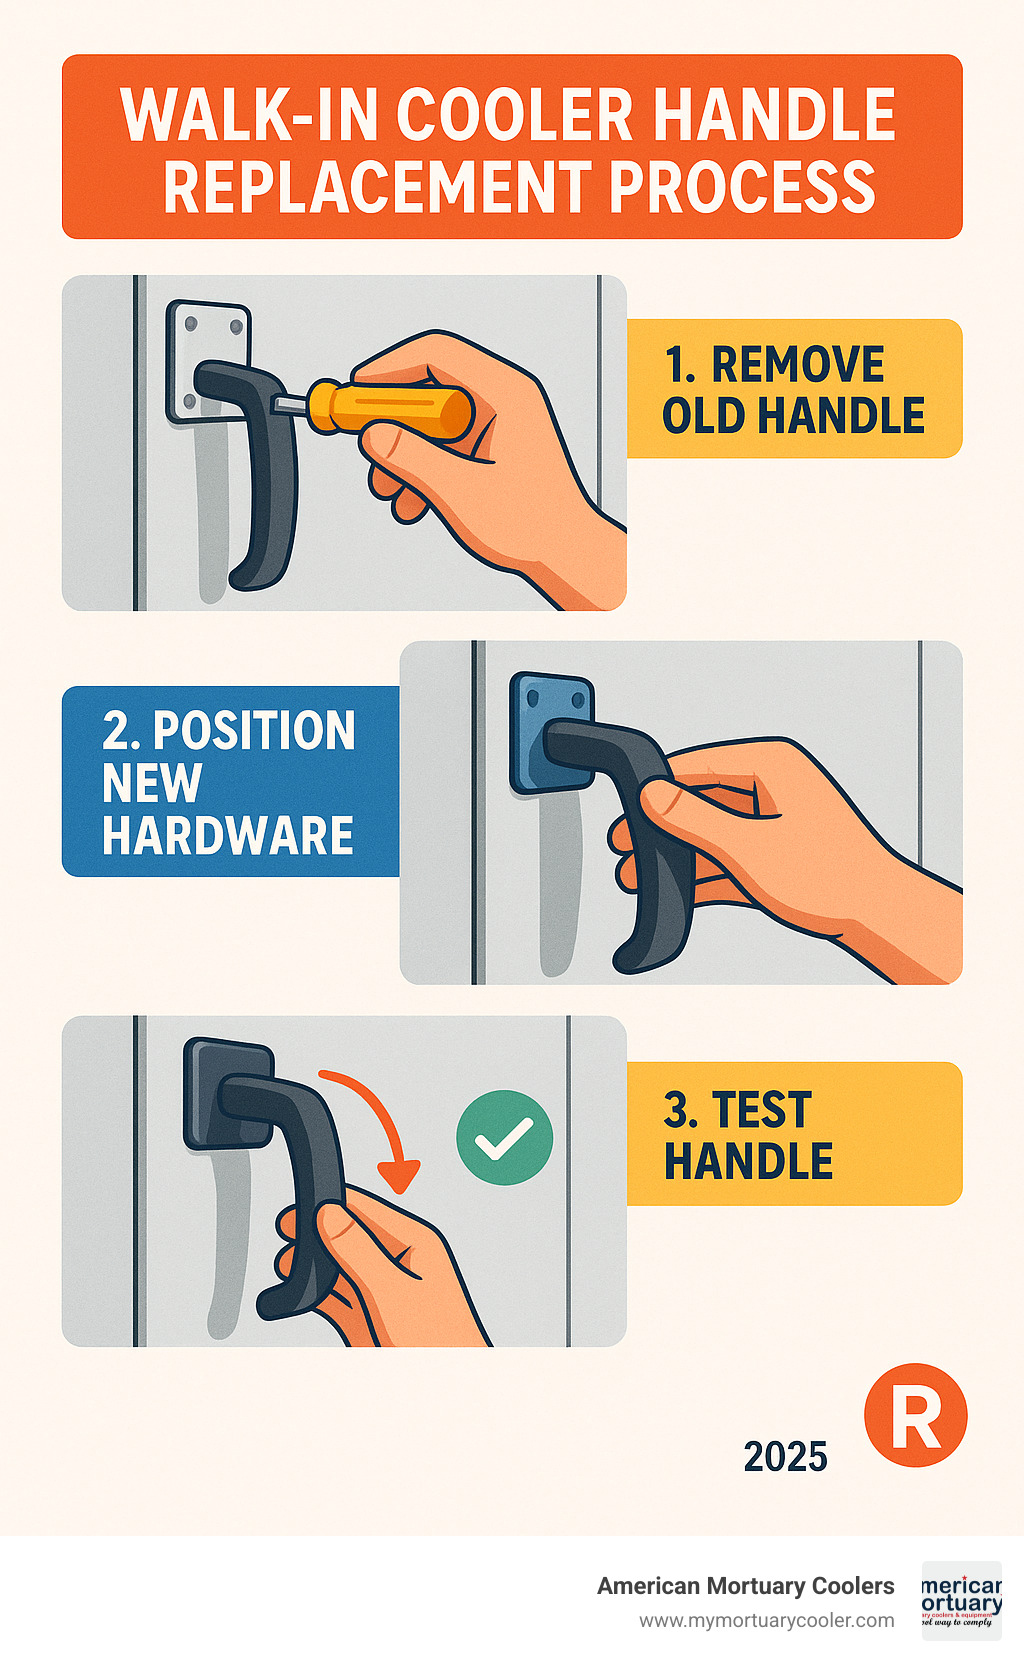
Simple walk in cooler handle glossary:
What Is a Walk-In Cooler Handle and Why It Matters
Think of your walk in cooler handle as the quarterback of your cooler door system. It's not just a simple handle - it's actually a complete latch assembly with several hardworking parts that keep your cooler running efficiently and safely.
The main components include the latch body (that's the handle you see and grab), the strike plate (mounted on the door frame where the latch catches), and the inside safety release mechanism that could literally save someone's life. These parts work together to do much more than just open and close your door.
Here's what makes it special: when you close the door and turn the handle, you're creating the compression force needed to squeeze that door gasket tight against the frame. This prevents warm air from sneaking in and cold air from escaping - which is pretty much the whole point of having a cooler in the first place.
Quality handles also include mounting hardware with offset capabilities to fit different door thicknesses. The best ones use cam-action mechanisms that give you extra leverage when latching, ensuring your gasket stays properly compressed even as it ages and your door frame settles over time.
How the Handle Keeps Cold Air In
Your walk in cooler handle is basically the gatekeeper for your cooler's temperature control. When you turn that handle to the closed position, the latch mechanism pulls the door snug against the frame, compressing the door gasket to create an airtight seal.
The compression force needs to be consistent all around the door to prevent sneaky air leaks. Door alignment is just as crucial. A properly working handle assembly makes sure your door sits perfectly flush in the frame, preventing thermal bridging - that's when cold air finds little gaps to escape through. Even tiny air leaks can be energy vampires, increasing your power bill by 10-15% while causing annoying ice buildup and temperature swings.
Safety Features Every Handle Must Have
Here's something that's not negotiable: every walk-in cooler handle must have an inside release mechanism. This allows anyone who gets accidentally locked inside to get out safely. It's not just smart - it's the law under OSHA egress rules.
The inside release usually works with a twist handle or lever that disengages the latch from inside the cooler. No matter what's happening with the outside handle, this inside mechanism must always work independently.
Modern handles also feature ADA-friendly lever designs that don't require a strong grip to operate. If your facility needs security, keyed lock options are available, but they still maintain that critical inside release function.
Types of Walk-In Cooler Handles & How to Choose the Right One
Choosing the right walk in cooler handle isn't just about grabbing the cheapest option - it's about finding the perfect match for your specific needs and environment.
Material choice makes the biggest impact on longevity and performance. Stainless steel handles are the gold standard for demanding environments. They resist corrosion beautifully, handle frequent washdowns without complaint, and keep looking professional even after years of heavy use. Yes, they cost more upfront, but they typically last 5-7 years compared to 3-5 years for other materials.
Chrome-plated zinc handles offer solid performance at a friendlier price point. They work great in standard commercial applications where you're not dealing with constant moisture or aggressive cleaning chemicals. For high-traffic areas that need extra durability without the stainless steel price tag, heavy-duty chrome options split the difference nicely.
Configuration options affect both functionality and installation. Recessed handles sit flush with the door surface, giving a clean look and reducing snag hazards in tight spaces. Surface-mount designs are easier to install and often provide better ergonomic grip options.
Strike plate offsets are crucial for proper fit. Standard ranges include 1/8" to 3/8" for thinner applications and 3/4" to 1 1/2" for thicker door and frame combinations. Getting this measurement right ensures proper door alignment and seal compression.
When it comes to brands, Kason, Keil, and Component Hardware dominate the commercial market for good reason. Their complete kits include all mounting hardware, gaskets, and detailed instructions.
| Material | Finish Options | Typical Lifespan | Cost Range | Best Applications |
|---|---|---|---|---|
| Stainless Steel | Brushed, Polished | 5-7 years | $150-$400 | High-humidity, frequent cleaning |
| Chrome-Plated Zinc | Polished, Satin | 3-5 years | $17-$200 | Standard commercial use |
| Heavy-Duty Chrome | Polished | 4-6 years | $100-$300 | High-traffic applications |
Locking vs Non-Locking Walk-In Cooler Handle
The security question comes up in almost every walk in cooler handle selection. Non-locking handles make sense for busy operations where quick access trumps security concerns. Kitchen staff can grab ingredients without fumbling for keys, and there's one less thing to worry about during rush periods.
Locking handles serve important purposes beyond just keeping people out. They help with food safety compliance by restricting access to temperature-sensitive inventory. They also provide employee access control - you can limit who has access to expensive ingredients or controlled substances.
The key safety point here is that locking never affects the inside release mechanism. Anyone inside the cooler can always get out, regardless of the exterior lock status.
Compatibility & Universality
Walk-in cooler handles aren't like light bulbs - you can't just assume any handle will fit any door. Door thickness varies significantly, typically ranging from 4 to 6 inches for insulated panels. The existing bolt pattern on your door determines what handles will mount properly without drilling new holes.
Retrofit kits can be lifesavers when you're dealing with older installations or discontinued handle models. These kits include adapter plates and hardware that let you mount modern handles on older door preparations.
Before ordering anything, measure your current setup carefully. Note the door thickness, bolt hole spacing, and strike plate offset. For comprehensive guidance on making the right choice, our detailed guide on All About Cooler Door Handles walks through the measurement and selection process step by step.
Common Problems, Costs, and Tools You'll Need
Let's be honest - walk in cooler handle problems always seem to happen at the worst possible times. You're rushing to grab ingredients for the dinner rush, and suddenly the handle won't latch properly.
The good news is that most handle problems follow predictable patterns. Loose mounting screws are probably the most common issue we see. Those constant temperature changes cause everything to expand and contract, gradually working screws loose over time.
Frozen latch mechanisms are another frequent headache, especially in freezer applications. When moisture sneaks into the handle assembly and freezes solid, you're not opening that door until it thaws out. This usually happens when door seals start failing and let humid air creep in.
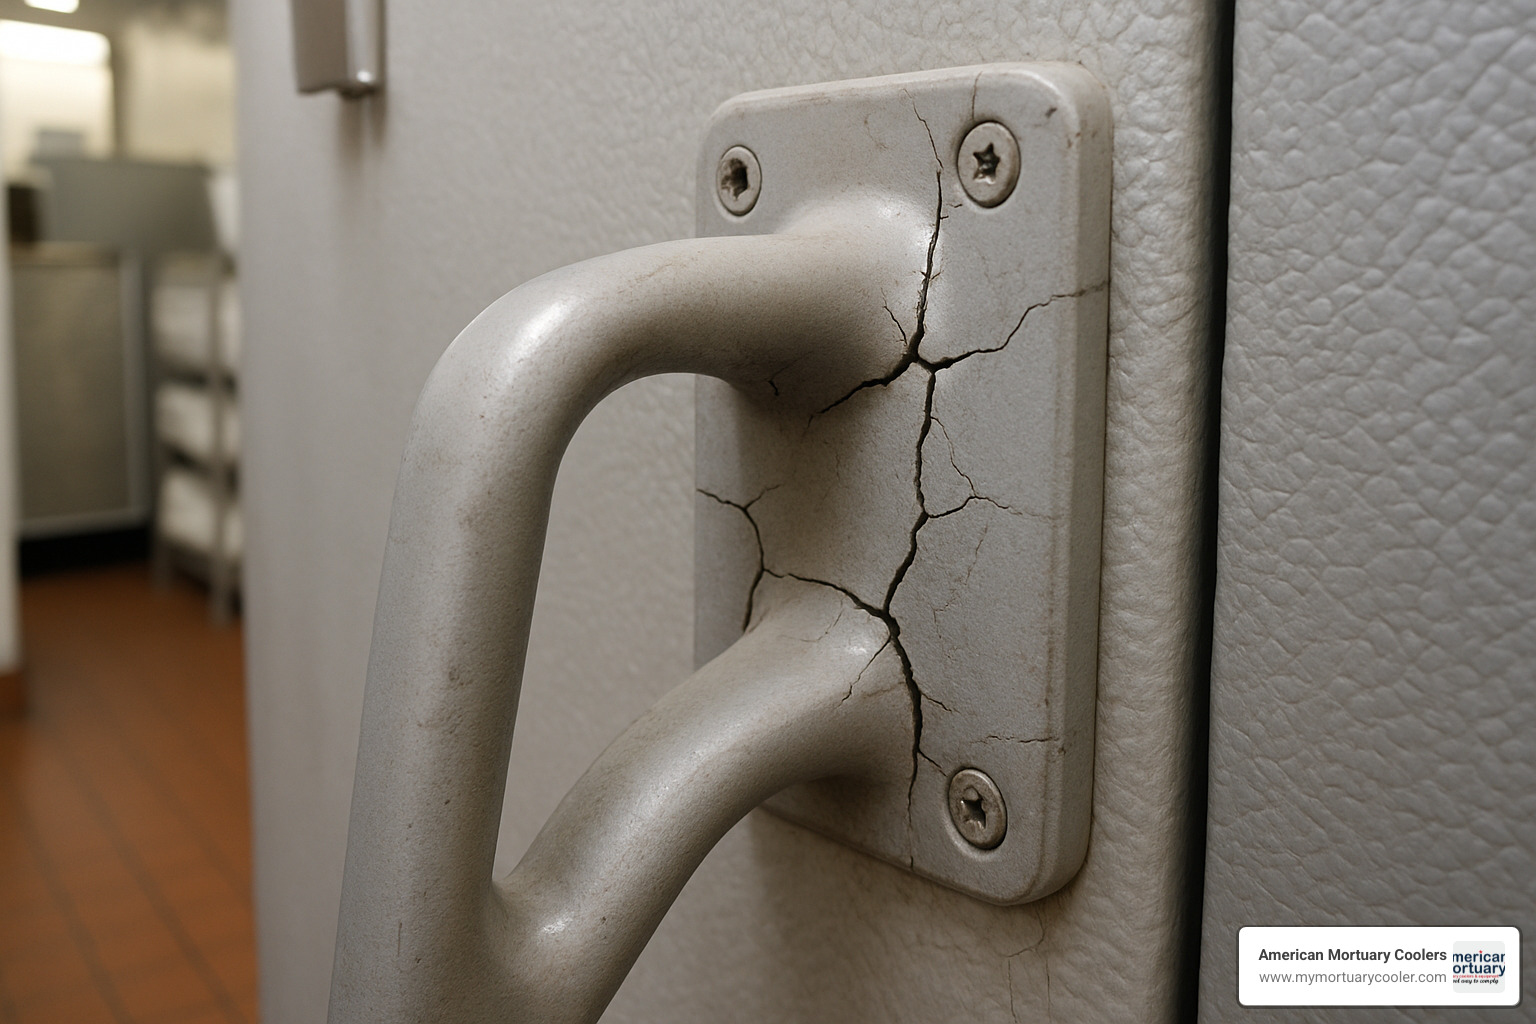
Worn strike plates develop over time as the metal surfaces wear down from thousands of open-close cycles. After 3-5 years of heavy use, you'll notice the door doesn't latch as firmly, or the seal doesn't compress properly. Door misalignment can throw everything off too - whether it's from building settling, worn hinges, or a door frame that's seen better days.
Now for the money talk. Basic walk in cooler handle kits start around $17.79 for simple, no-frills models. Premium locking systems from top manufacturers can run over $400, but most commercial-grade handles fall in the sweet spot of $75-$200.
Tool-wise, you won't need anything fancy. A Phillips head screwdriver, hex wrenches (usually 1/4" and 5/16"), and a drill with metal bits will handle most jobs. For heavy-duty installations, you might want a socket set for through-bolts.
Troubleshooting a Faulty Walk-In Cooler Handle
When your walk in cooler handle starts acting up, start with the obvious stuff first. If it feels loose or wobbly, grab a screwdriver and check those mounting screws. You'd be surprised how often a simple tightening fixes the problem.
If the latch won't catch properly, take a close look at the strike plate. Sometimes it just needs adjustment, but other times wear has pushed it beyond its adjustment range.
Ice buildup around the handle is like a warning light on your dashboard. It's telling you that warm, humid air is sneaking in somewhere and freezing when it hits the cold surfaces. Clean off the ice carefully, but don't ignore the message - you've got a seal problem that needs attention.
Warped doors and weak return springs can also cause headaches. A warped door won't align properly no matter how much you adjust the strike plate. Weak springs in the latch mechanism mean the handle won't return to position reliably.
Budgeting for Replacement Parts
Most commercial walk in cooler handle assemblies give you 2-5 years of reliable service, depending on how hard you work them. A busy restaurant kitchen might need replacements more often than a storage facility that only gets accessed a few times a day.
Here's a pro tip: if you're running multiple coolers, consider buying handles in bulk. Many suppliers offer volume discounts that can add up to real savings. Plus, you'll have spares on hand when Murphy's Law strikes.
Don't forget to check your warranty coverage before ordering replacements. Some manufacturers stand behind their door hardware longer than you might expect, which can save you money on premature failures.
Step-by-Step Walk-In Cooler Handle Replacement Guide
Ready to tackle that walk in cooler handle replacement? You're in for good news - this job typically wraps up in under 15 minutes and doesn't require any specialized expertise.
The beauty of handle replacement lies in its simplicity. You'll follow six main steps that flow naturally from one to the next: carefully removing the door seal around the handle area, loosening the mounting screws, detaching the old handle assembly, positioning your new handle, tightening everything to specification, and re-seating that door gasket. The key is taking your time with each step rather than rushing through.
Here's something I always tell folks - test everything when you're done. A properly installed handle should latch smoothly, create a tight seal, and most importantly, allow easy exit from inside the cooler. That inside release mechanism isn't just a nice feature - it's a safety requirement that could save someone's life.
For additional visual guidance on the process, this resource on How to Replace the Fridge Handle | Commercial Refrigerators & Freezers provides helpful step-by-step photos that complement our instructions.
Tool Checklist & Preparation
Before you touch that old handle, let's get you properly equipped. Safety first - grab your safety glasses and work gloves. I've seen too many people get caught off guard by sharp metal edges or flying debris when removing old hardware.
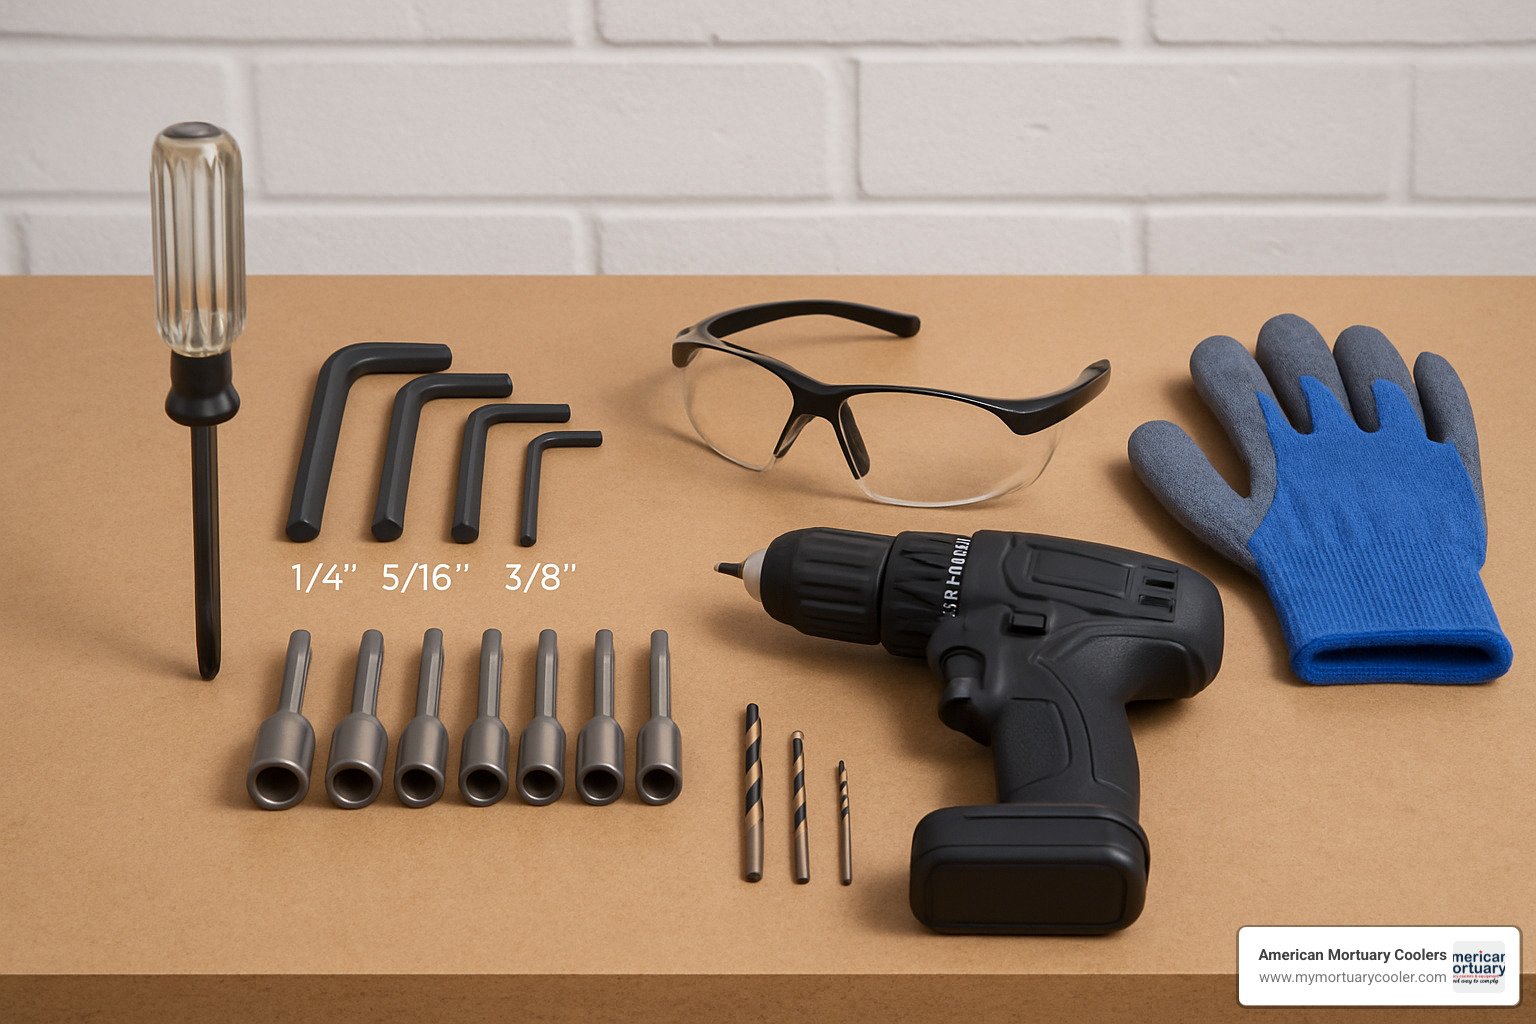
Your toolkit should include a Phillips head screwdriver (usually #2 size works perfectly), a hex wrench set covering 1/4", 5/16", and 3/8" sizes, and a nut driver set or socket wrench for the heavier hardware. If you're doing a completely new installation, you'll need a drill with metal bits.
Don't forget the finishing touches - clean rags and mild detergent help you clean up the installation area, and replacement gasket sealant might be needed if the door seal shows wear around the handle area.
Here's a pro tip from years of experience: check your manufacturer's torque specifications before you start. Over-tightening is just as problematic as under-tightening - you can crack door panels or strip threads if you get too aggressive, while loose hardware leads to poor sealing and eventual failure.
Installation Methods for Different Handle Kits
Different manufacturers have their own approaches to mounting, and understanding these differences saves you headaches during installation. Through-bolt systems provide the strongest, most durable mounting by passing bolts completely through the door panel. They're my preferred choice for high-traffic applications, though you'll need access to both sides of the door during installation.
Surface-mounted systems use screws that thread into inserts within the door panel. These are easier to install since you're working from one side, but they may not handle heavy-duty use as well as through-bolt designs.
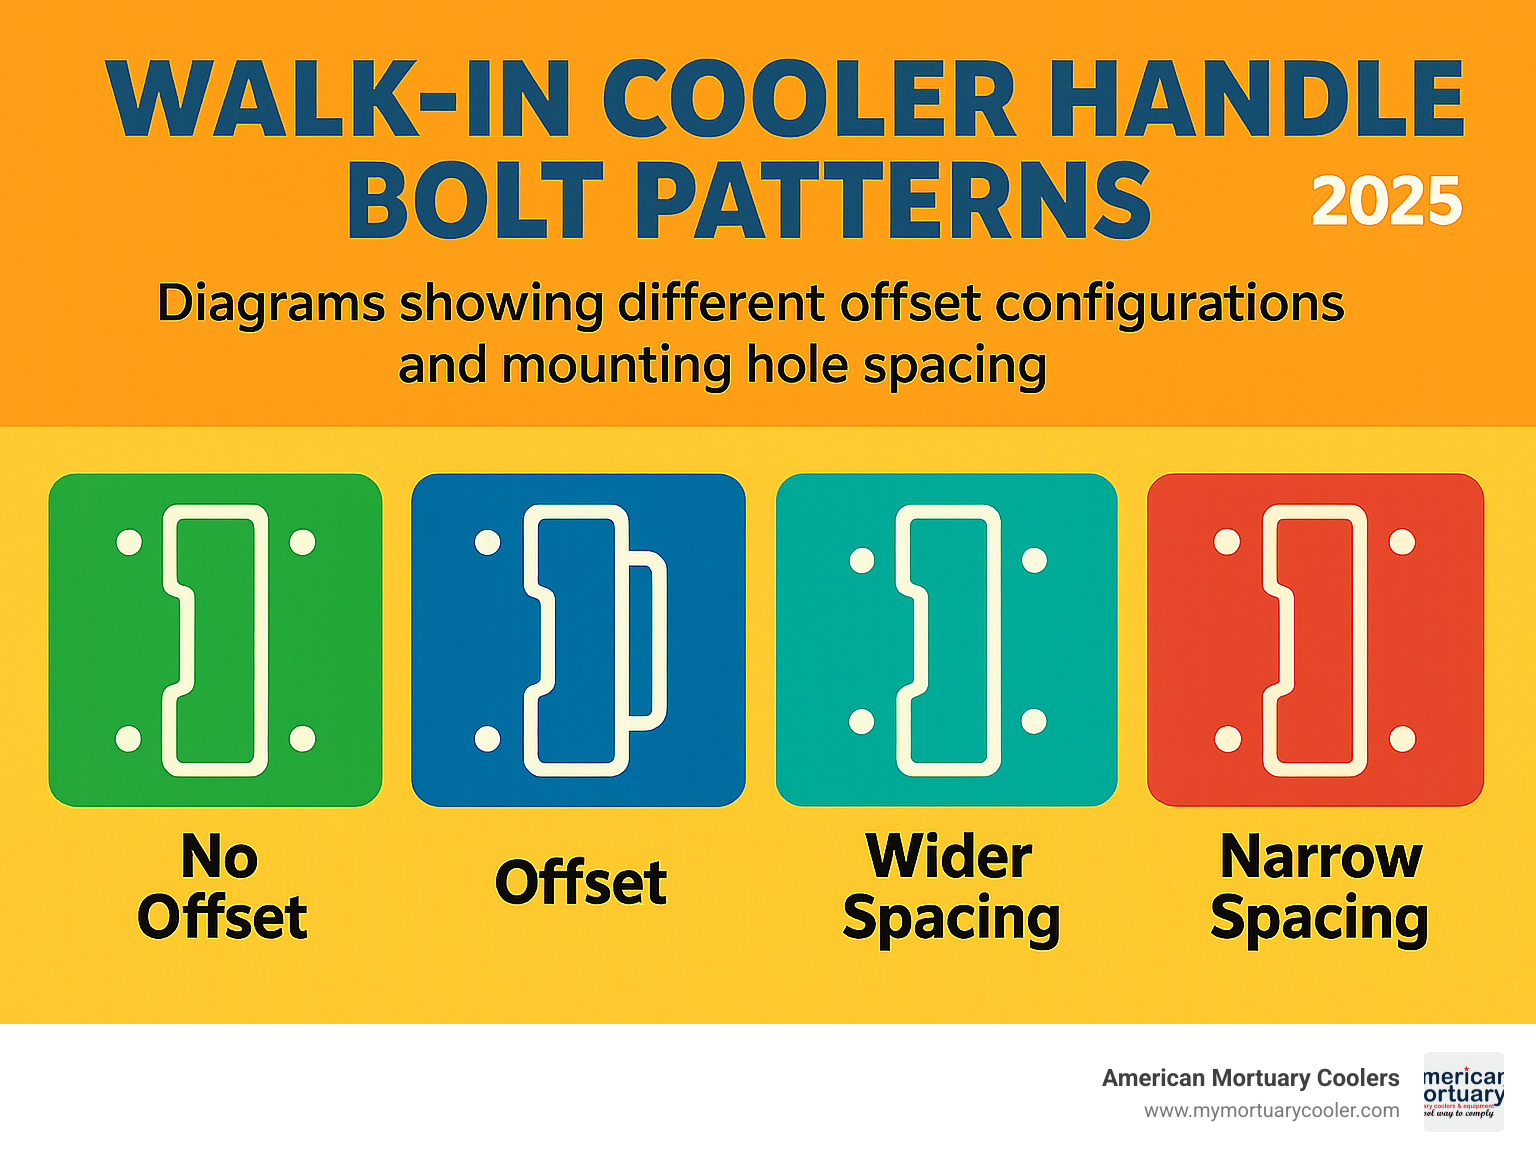
Strike plate offsets are where things get interesting. Your door and frame relationship determines which offset range you need. Standard applications typically use 1/8" to 3/8" offsets, while deeper-set doors require 3/4" to 1 1/2" ranges. Getting this wrong means your handle won't align properly with the strike plate, leaving you with a door that won't latch securely.
When you're working with Kason 0056 series handles, pay attention to the different strike configurations and inside release lengths available. Component Hardware Keil systems use their own bolt pattern that typically won't interchange directly with other brands without some modification work.
The key to success? Measure twice, install once. Take careful measurements of your existing setup before ordering parts, and you'll save yourself the frustration of finding compatibility issues after you've already started the job.
Maintenance Tips to Extend Handle Life & Improve Efficiency
Taking care of your walk in cooler handle doesn't require a maintenance degree - just a little attention each month can save you hundreds in replacement costs and energy bills.
Start with a simple monthly cleaning using food-safe detergent. The latch mechanism and strike plate are magnets for grease, food particles, and general grime that can gum up the works. I've seen handles that wouldn't latch properly simply because years of buildup prevented the mechanism from engaging fully.
Food-safe lubricant is your handle's best friend, but here's the trick - less is more. A few drops on the moving parts keeps everything smooth, but too much creates a sticky mess that attracts more dirt than it prevents. Focus on the pivot points and latch mechanism, avoiding the gasket contact areas where lubricant can interfere with sealing.
Don't forget to check your mounting hardware during each cleaning. Walk in cooler handle assemblies experience constant thermal cycling - expanding when warm, contracting when cold. This natural process gradually loosens screws over time. A quick tightness check prevents the wobbly handle syndrome that leads to poor sealing and eventual failure.
Here's something most people miss: your handle and door closer work as a team. If your door closer is too tight, staff will struggle to latch the handle properly. Too loose, and the handle mechanism does all the work, wearing out faster. Finding that sweet spot where the door closes easily but latches securely extends both components' life.
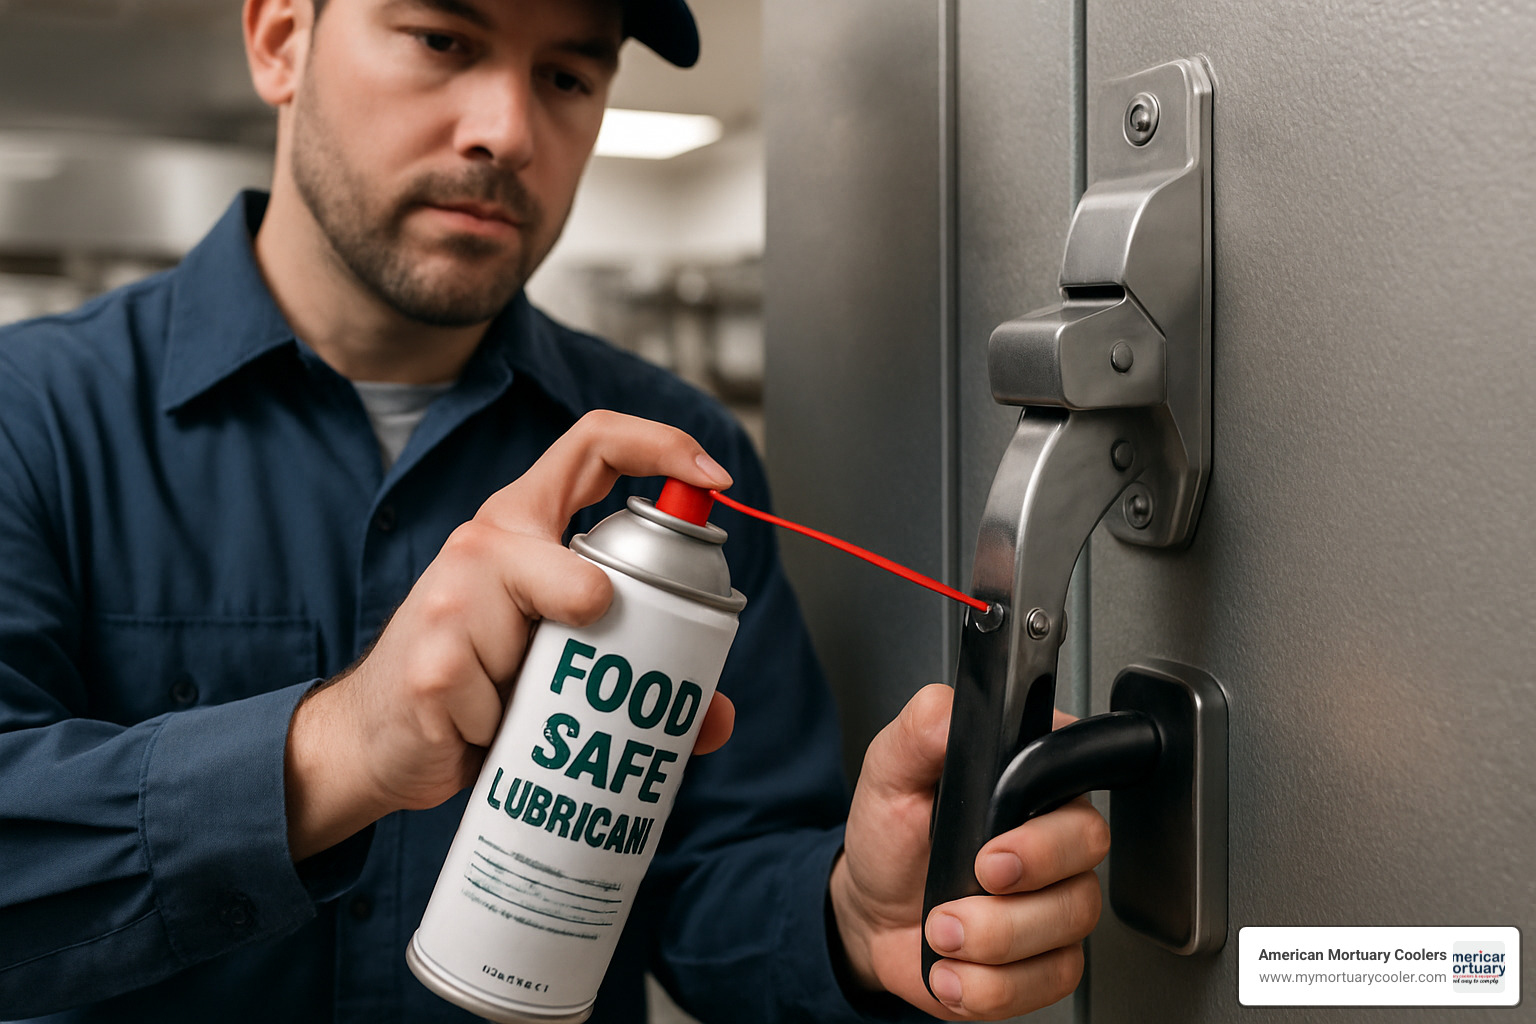
Watch for corrosion, especially in high-humidity environments or facilities that do frequent washdowns. Stainless steel handles resist corrosion better, but even they need attention. Catching corrosion early means a simple cleaning instead of complete replacement.
For a comprehensive approach to handle selection and maintenance, our Ultimate Checklist for Choosing a Walk-In Freezer Door Handle Replacement covers all the factors that affect long-term performance and cost-effectiveness.
How Handles Affect Energy Costs
Your walk in cooler handle might seem like a small component, but it has a big impact on your energy bills. When that handle stops creating proper seal compression, your refrigeration system starts working overtime to compensate for warm air sneaking in through gaps.
The math is pretty straightforward: poor door sealing forces your compressor to run more cycles to maintain temperature. Even a small air leak can increase energy consumption by 10-15%. Over a year, that adds up to real money - often more than the cost of a quality handle replacement.
Seal compression force is where the magic happens. A properly adjusted handle pulls the door tight against the gasket, creating that airtight barrier your cooler needs. When handles lose their adjustment range or the latch mechanism weakens, that compression becomes inconsistent.
Door closer tension plays a supporting role in this energy equation. If your closer is too weak, the handle mechanism must provide all the sealing force, leading to premature wear. If it's too strong, staff might not fully engage the latch, leaving the door partially unsealed.
Reduced compressor cycles are the reward for proper handle maintenance. When your door seals consistently, the refrigeration system maintains steady temperatures with less effort.
Frequently Asked Questions about Walk-In Cooler Handles
How often should I replace my walk-in cooler handle?
Here's the honest answer: it depends on how hard you work your equipment. Most walk in cooler handle assemblies need replacement every 2-5 years, but I've seen handles in busy restaurant kitchens wear out in 18 months, while others in low-traffic storage areas last 6-7 years.
The real indicator isn't time - it's performance. When your handle starts feeling loose or wobbly, when staff complain it's getting harder to latch, or when you notice the door isn't sealing as tightly as it used to, that's your cue. Don't wait until the inside release fails - that's a safety issue that could put someone at risk.
High-traffic facilities should budget for replacement every 2-3 years as part of regular maintenance. If you're opening that door dozens of times per day, the mechanism simply wears faster. For lighter-use applications, you can often stretch it to 4-5 years with proper maintenance.
Are walk-in cooler handles universal across brands?
I wish I could tell you yes, but walk in cooler handle compatibility is more complicated than that. While many handles look similar, the devil's in the details - door thickness, bolt hole patterns, strike plate offsets, and mounting methods all vary between manufacturers.
The good news is that retrofit kits and adapters solve most compatibility issues. Major brands like Kason, Component Hardware, and Keil have some overlapping specifications, but direct substitution isn't guaranteed. Before ordering, measure your existing installation carefully: door thickness, bolt hole spacing, and how far the strike plate sits from the door frame.
When in doubt, take photos of your current setup and consult with your supplier. Most experienced distributors can identify compatibility issues and suggest alternatives. Sometimes a simple adapter plate or different strike configuration is all you need to make a newer handle work with an older door.
What safety codes regulate inside release mechanisms?
This is where safety meets the law, and it's not negotiable. OSHA egress requirements mandate that every walk-in cooler must have a functioning inside release mechanism. Period. No exceptions, no workarounds.
The inside release must work independently of any exterior locks - even if you have the door keyed for security, someone trapped inside must be able to get out without a key. The mechanism should be clearly marked and easily accessible, and some jurisdictions require specific signage or emergency lighting inside the unit.
Local building codes often add their own requirements on top of federal OSHA standards. Some areas mandate specific types of signage, others require the inside release to be illuminated or glow-in-the-dark. Check with your local building department to understand what applies in your area.
The most important thing? Test the inside release regularly as part of your maintenance routine. A mechanism that works perfectly for years can suddenly fail when someone's life depends on it. Make it part of your monthly safety checklist - it takes 30 seconds and could save a life.
Conclusion
Getting the right walk in cooler handle isn't just about opening doors - it's about protecting your entire refrigeration investment. When you choose quality components and install them properly, you're setting yourself up for years of reliable service, better energy efficiency, and most importantly, complete safety compliance.
Here's what I've learned after years in the commercial refrigeration business: the cheapest handle isn't always the best value. A $400 premium handle that lasts seven years and maintains perfect sealing beats a $50 unit that fails after 18 months and costs you hundreds in energy waste. Do the math, and quality wins every time.
At American Mortuary Coolers, we see this principle play out daily in our specialized field. Based in Tennessee with delivery across all 48 contiguous states, we've built our reputation on understanding that reliable door hardware makes the difference between equipment that just works and equipment you can truly depend on. When you're dealing with sensitive preservation requirements, there's no room for compromise on components like handles, seals, and safety mechanisms.
The funeral industry has taught us that attention to detail matters enormously. The same precision we apply to mortuary cooler design applies to every walk in cooler handle selection. Whether you're running a busy restaurant kitchen or managing a medical facility, your door hardware needs to perform flawlessly, day after day.
Remember the non-negotiables: always prioritize the inside safety release, choose materials that match your environment, and don't skip regular maintenance. A handle that can't get someone out safely isn't worth having, regardless of price or features.
For facilities with unique preservation requirements, our guide on Doorway to Preservation: Selecting Mortuary Dead Body Storage Freezer Doors shows how proper door design and hardware selection work together to maintain optimal conditions.
The bottom line? A well-chosen walk in cooler handle is an investment in your facility's efficiency, your staff's safety, and your peace of mind. Take the time to get it right the first time, and you'll thank yourself later when everything just works the way it should.


